Sunday, February 26, 2012

My Glam Bag vs Birchbox for February

Hello Everyone,

Another month, another bag and box. This month, MyGlam bag has done it again. There is a special certificate in there that I really enjoyed which I will talk about in my blog. What I can say about Birchbox is they are very consistent and I like the fact that they give high end products to try.

I will first go over what's in MyGlam bag for February:
Here is the metallic pink envelope with goodies inside-

Since it is February, the bag is pink with black hearts. Very cute.

Inside, I have a $100 gift certificate for any hair styling tool and hair extensions from NuMe. Again, it is $10 a month and you get products that are worth so much more.

I have never bought any styling tools from this brand before, but I have heard good things about them. I went onto their website and order the Pearl tourmaline curling wand that everyone raves about. It is so popular that it is on back order right now.

The next item I have in the bag is the Freeman Facial Hydration Mask in Goji Berry. This reminds me of the cucumber facial mask that was in the January MyGlam bag. I really enjoy these face masks, but I also heard that some people broke out from it. It didn't break me out so I do like it.

February is also known for sweets and chocolate. There is a small box of Ghirardelli chocolate in milk and dark.


Inside a small pink bag are sample packets of Premier Eye Cream and Instant Stretching and Revitalizing Mask. So far I have enjoyed it and the fragrance is very settle which I do like.


The last two items are NYX roll on for eyes, face, and body. The one that came in my bag is in Platinum RES12. I don't really like it because it comes off easily. If you do apply it on your eyes, I recommend you to use a glue glitter to have it stay on. I am just not a fan of this.


X Out Shine Control- it is an oil-free moisturizer to keep the shine off your face. It's good for me because I do have normal to oily skin. I have not tried this yet to give any reviews.

That is the end of the MyGlam Bag for February. Let's move on to what's in my Birchbox for February.

This month is about focusing the spotlight on yourself. Inside are a lot of luxuries skin and hair products.

First is the Shu Uemura Art of Hair- it is a nourishing protective leave-in oil for dry hair with camellia oil. I don't normally put products in my hair because if I do, I feel like it gets greasy very quick. I did try it on my ends to make it look silky and shiny. I should do it more often because every time I go to the salon for a haircut, they always say my ends look dry. I am just too lazy to put it on everyday even though it only takes a few seconds. It feels like a great product and I am sure if you do have dry hair it does help.


Also inside the box is Eye Rock Designer Liner. When I saw this, it looks like a fun idea, but I don't think it will work. Everyone's eye shape is a bit different and I am skeptical about using a stick-on liner strip to create the perfect cat eye. Ever since the nail polish stickers came out, there is a sticker for everything. I still prefer to use a eye liner.


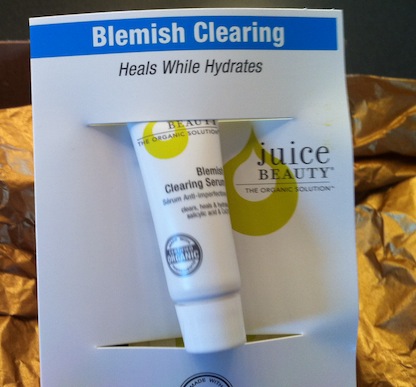
Juice Beauty Blemish Clearing Serum- I do like this brand mainly because it uses organic botanicals. I don't have any blemishes right now to test on but once I do, I will see how well this works.


Kiehl's Clearly Corrective Dark Spot Solution- I am excited to use this product because I do have some dark spots that are left behind by pimples and sun spots. It does takes some time to see results. I only use this at night before bed, but it says to apply morning and night. It also claims to even out skin tone with vitamin C and white birch extracts. Very fancy.


The last thing in the box is the Supersmile Powdered Mouthrinse- it is in a powdered form inside a packet where you would need to add water. This is like scope mouthwash, but it does not burn or have a strong minty taste. It's sweet and leaves your mouth refreshed. However, I don't think it is as refreshing as scope.  Still a great way to carry mouthwash in your purse.

Have a great night.
<3 <3 <3

Saturday, February 25, 2012

Hollywood Vanity Girl

Hello Everyone,

Since I love makeup and fashion, having my own vanity is something I have always wanted.  I didn't know exactly what I want in a vanity.... all I know is it needs to standout in my room. Seeing so many different ones, I was debating whether to stick with my Hayworth furniture theme (like my lingerie drawer or jewelry armoire that I have shown in my previous blog) or should I go with more Hollywood style.

Here is the Hayworth vanity that I was debating about: It's very nice and elegant.
What I end up purchasing is the Hollywood Vanity Girl. The lights and the outlets on the vanity makes it so much easier to get ready. I don't have to bend down and look for a plug or a place to set my hot flat iron. Also, it's fun to pretend I have my own little Hollywood star room that I can use to get ready.
Great to use for any makeup tutorials!!!

When you look closely at the table, it has holes to hold my hair dryer and flat iron.

I like to keep the table of my vanity clear of clutter with just a few items for decoration. I put the flower soap there to just add some color and I have my two closeup mirrors.

A big one and a small one. I thought the small one is so adorable, I just had to get it to match.


So, that is where I will be doing must of my makeup blogs.
Have a great night!
<3 <3 <3

Sunday, February 19, 2012

DIY (Do It Yourself)- Cute Soap Bars

Hello Everyone,

Just a fun idea for those who like to make custom gifts for your friends, family, co-workers, or love ones.
It means so much more when you make something because you are putting the time and effort. I always envy those who are very good at it. Making your own soap is a simple and fun process.

Let's get started.
First, you will need a pack of soap- at Michael's there are a variety of different types of soap that you can pick from such as clear/solid, shea butter/Herbal, etc...
I picked up both clear and solid packs of shea butter soap bars.


Each pack comes with a big chuck of soap with little squares. Cut the soap into cubes so it makes them easier to melt.


Once I finished cutting all the clear pieces, I need a cup to put the soap in so I can place it in the microwave to heat them up.

Microwave it for 40 seconds first and if there are still big solid chunks of soap continue to heat it up 10 seconds at a time so it doesn't get too hot. Once they are melted into a liquid form.....

(Clear)

(Solid)

you can now add colors or fragrance oil. Depending on how much soap you have melted, a few drops of color will do.... more or less if you like it darker or lighter.

For the fragrance oil, I would just put in a few drops at a time until I can smell it. I picked blueberry.... yummy!

A few drops of the red color makes the clear soap look like this:

A few drops of blue color in a solid soap look like this:

Since the soap are melted, you need to quickly pour them into the molds.
The first mold I have is this long half rod shape. You can also use the molds for baking as long as they are silicone material because you would need to pop them out when they become solid.

I poured in the pink clear melted soap to fill up 1/3 of the mold and then I added a pre-made soap (long flower shaped rod) in the middle before I fill the remaining up to the top. Let it sit for 45 minutes until it becomes solid.


Similar concept with the other soaps I made, however, you can also create layers with different colors. Remember to wait until the first layer turn a bit solid, before pouring in the second layer.

Because I want different colors, I poured in the blue to fill in the design.


Then I add in whatever color I want to create the layers.


45 minutes later.....
Here is how they look like! How cute are they? And they smell so good.


Popped them out of the plastic molds....


The different color layers:


To package the soap, I used saran wrap to seal them.


With the long soap, I cut it to show the nice flower design on the inside.


As a gift, you can put them into small clear gift bags and hand them out. I used my leftover Christmas bags....

Lets see how well the soap lathers up (pretty good):

I hope you enjoyed this DIY soap bar blog. There are so many other creative ways to design your soap, but I am just showing you the most simple way to do it.

What else did I do today? I got ready and walk Mochi at Fort Funston. Such a nice day today.


Cooking with Sugarcookie: Oyster noodle soup!